-default.png)
What is a Funnel?
A funnel is a strategic tool that helps you boost conversions by presenting targeted offers to customers at the right moment. Think of it as your digital sales assistant that knows exactly when to suggest complementary products or upgrades to maximize your revenue.
Available Funnel Types
Appsell offers three powerful funnel types to help you increase sales:
Product Upsell & Cross-sell - Suggest related or upgraded products
Volume Bundle Discount - Encourage bulk purchases with discounts
Frequently Bought Together - Show products commonly purchased together
The setup process is very similar across all funnel types, so once you master one, you'll easily create the others. For this guide, we'll walk through creating a Product Upsell & Cross-sell funnel as our example.
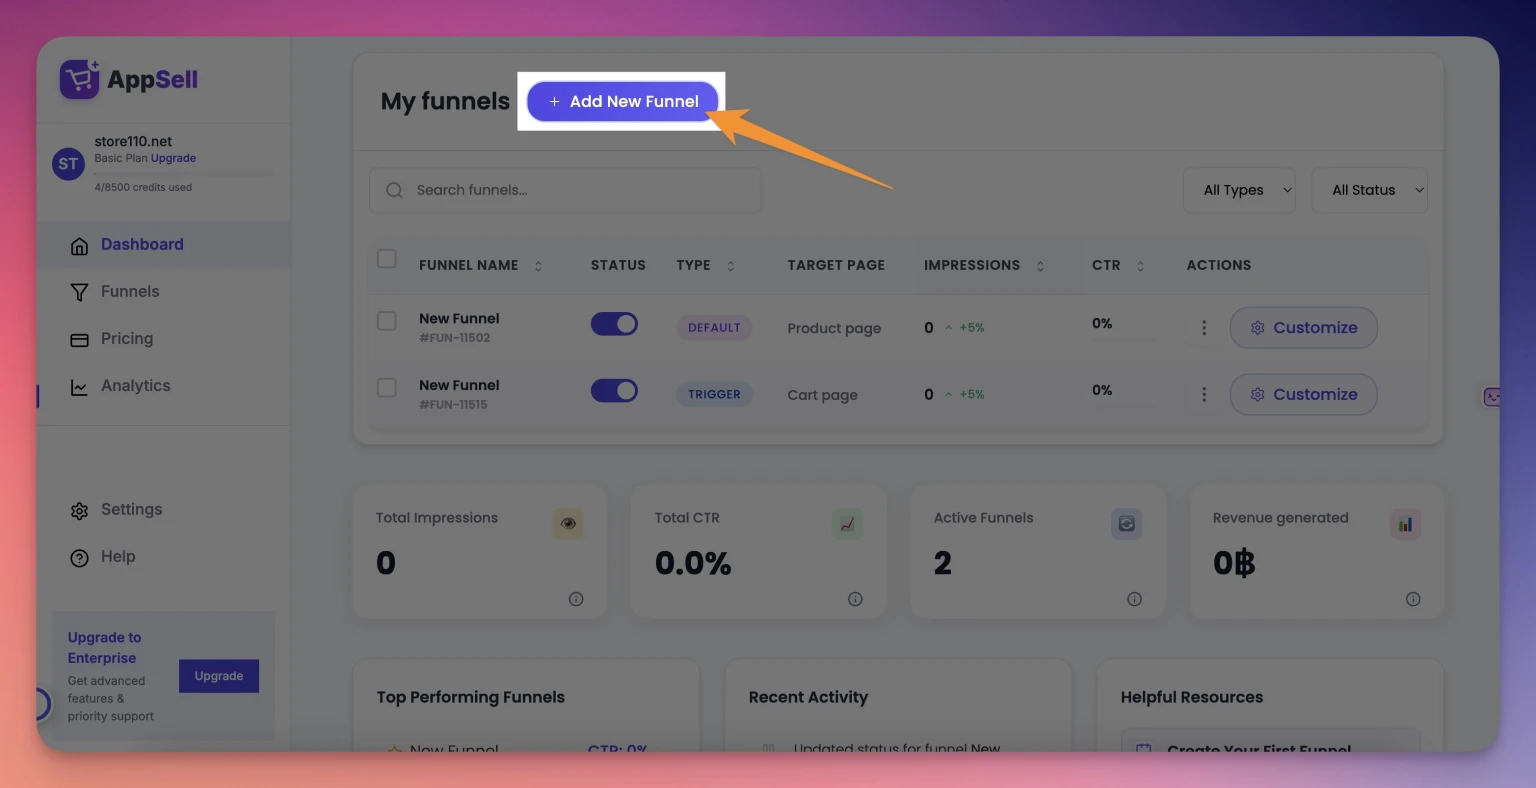
Step 1: Start a New Funnel
From your Appsell dashboard, locate and click the "Add New Funnel" button to begin creating your first funnel. This will open the funnel creation wizard.
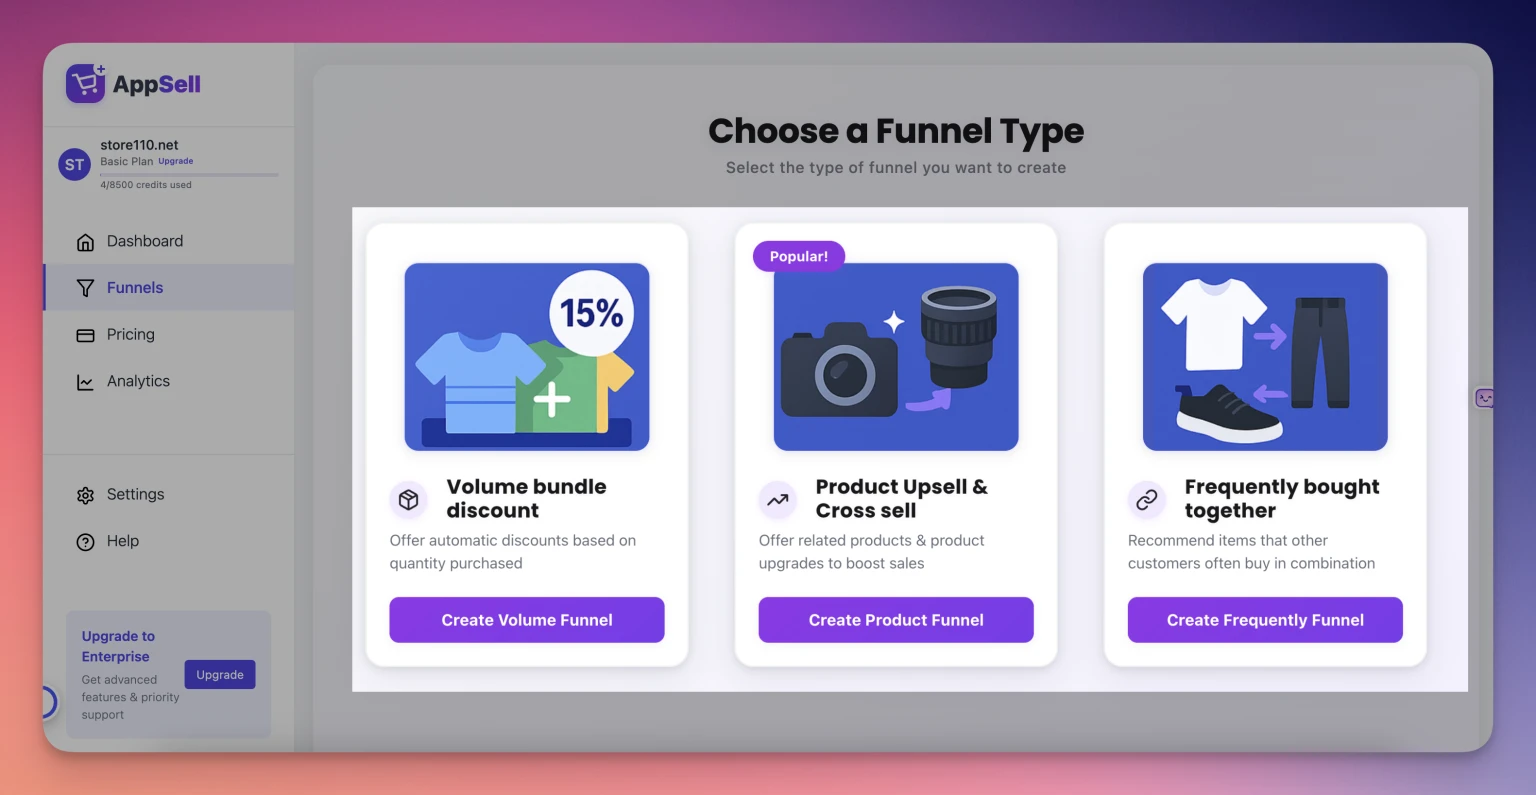
Step 2: Choose Funnel Type
Select Product Upsell & Cross-sell from the list of available funnel types. This type is perfect for suggesting complementary products or upgrades to customers. Remember, you can always create different funnel types later using the same process.
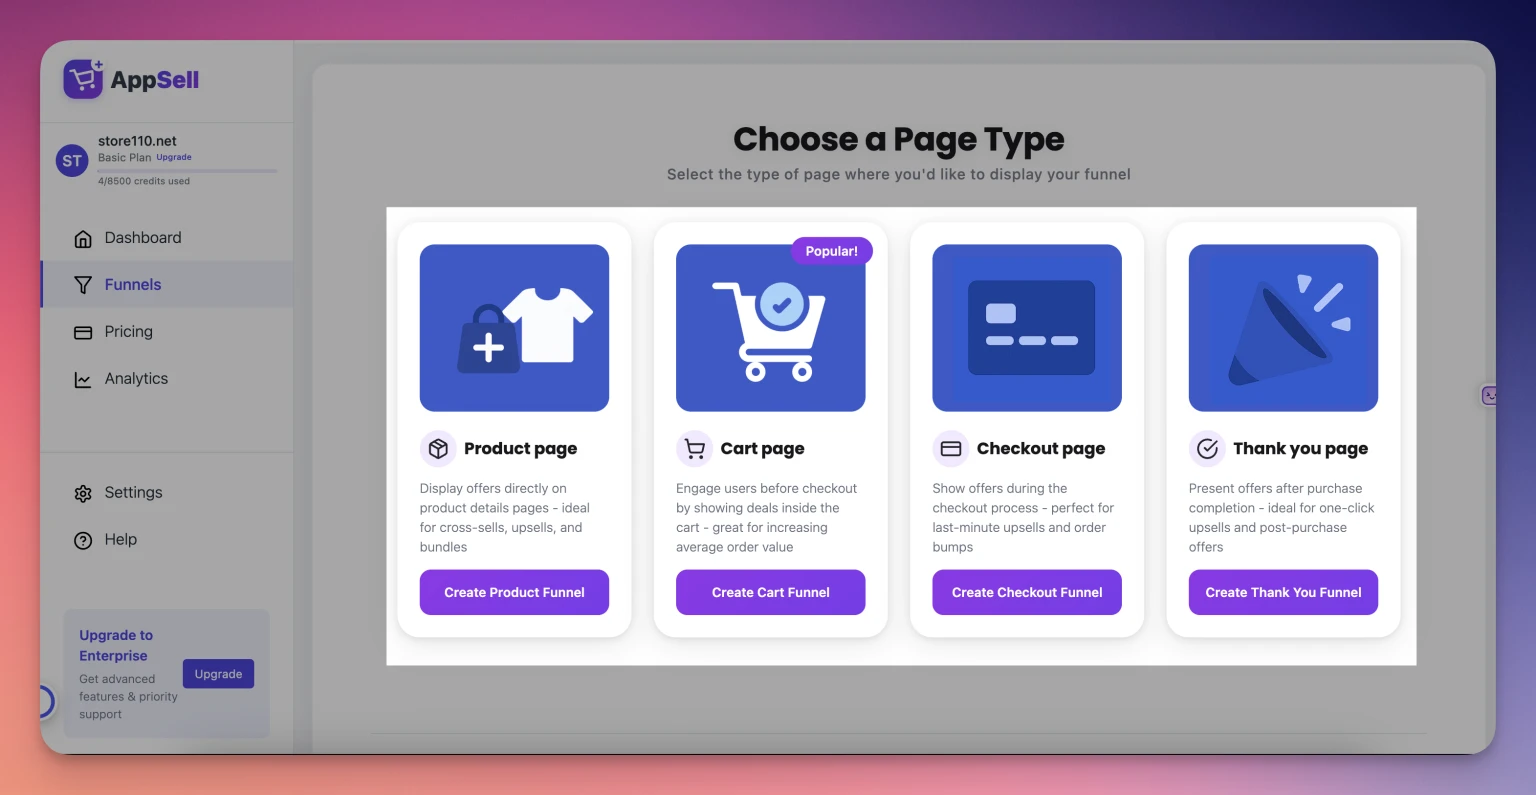
Step 3: Choose Where to Display the Funnel
Pick the page type where your funnel will appear to customers. Your options include:
Product page
Cart page
Checkout page
Thank You page
For this example, we'll select Cart page as it's an ideal location to present additional offers when customers are already committed to purchasing.
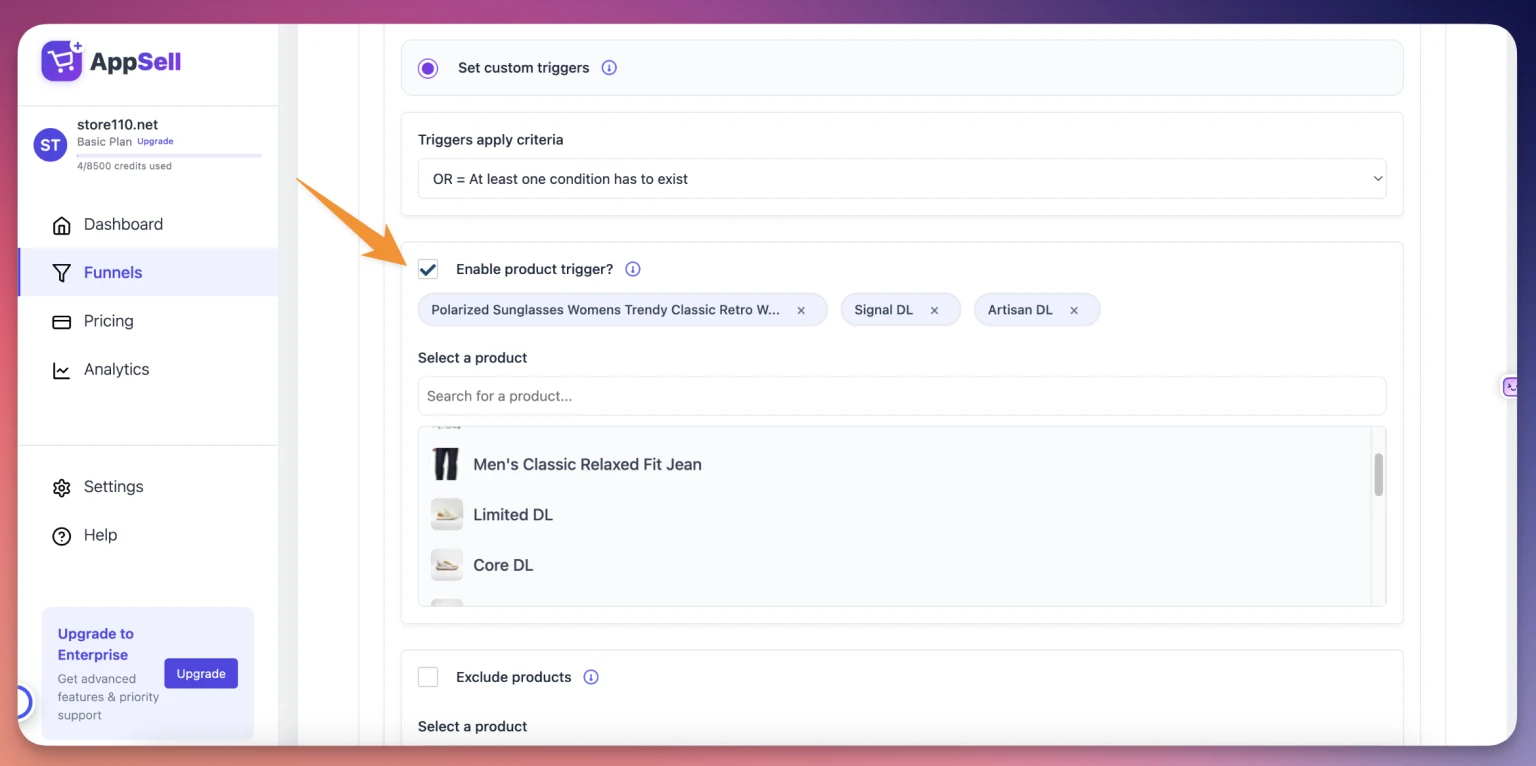
Step 4: Set Display Triggers
Configure the specific conditions that will trigger your funnel to appear. This ensures your offers are shown at the most relevant moments.
Example setup:
Show the funnel only when specific products are in the cart
You can also exclude certain products from triggering the funnel
Set minimum cart values or other conditions as needed
This targeting ensures your offers feel relevant and helpful rather than intrusive.
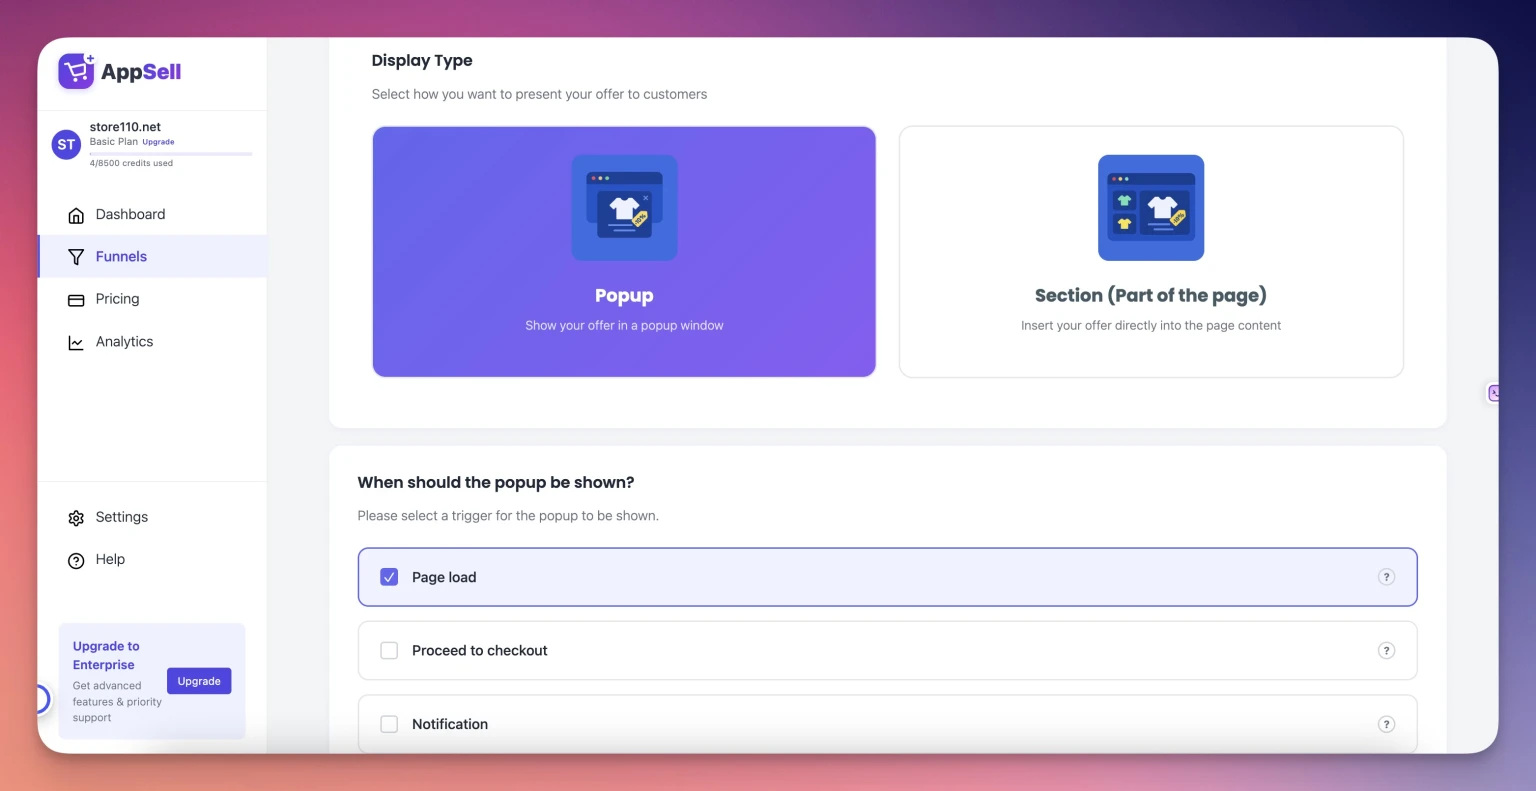
Step 5: Choose Display Type & Timing
Decide how and when your offer will appear to customers:
Display Type Options:
Popup - Appears as an overlay on the page
Section - Integrates directly into the page layout
Timing Options:
On page load
On checkout button click
After a specific time delay
When scrolling to a certain point
Choose the combination that best fits your store's user experience.
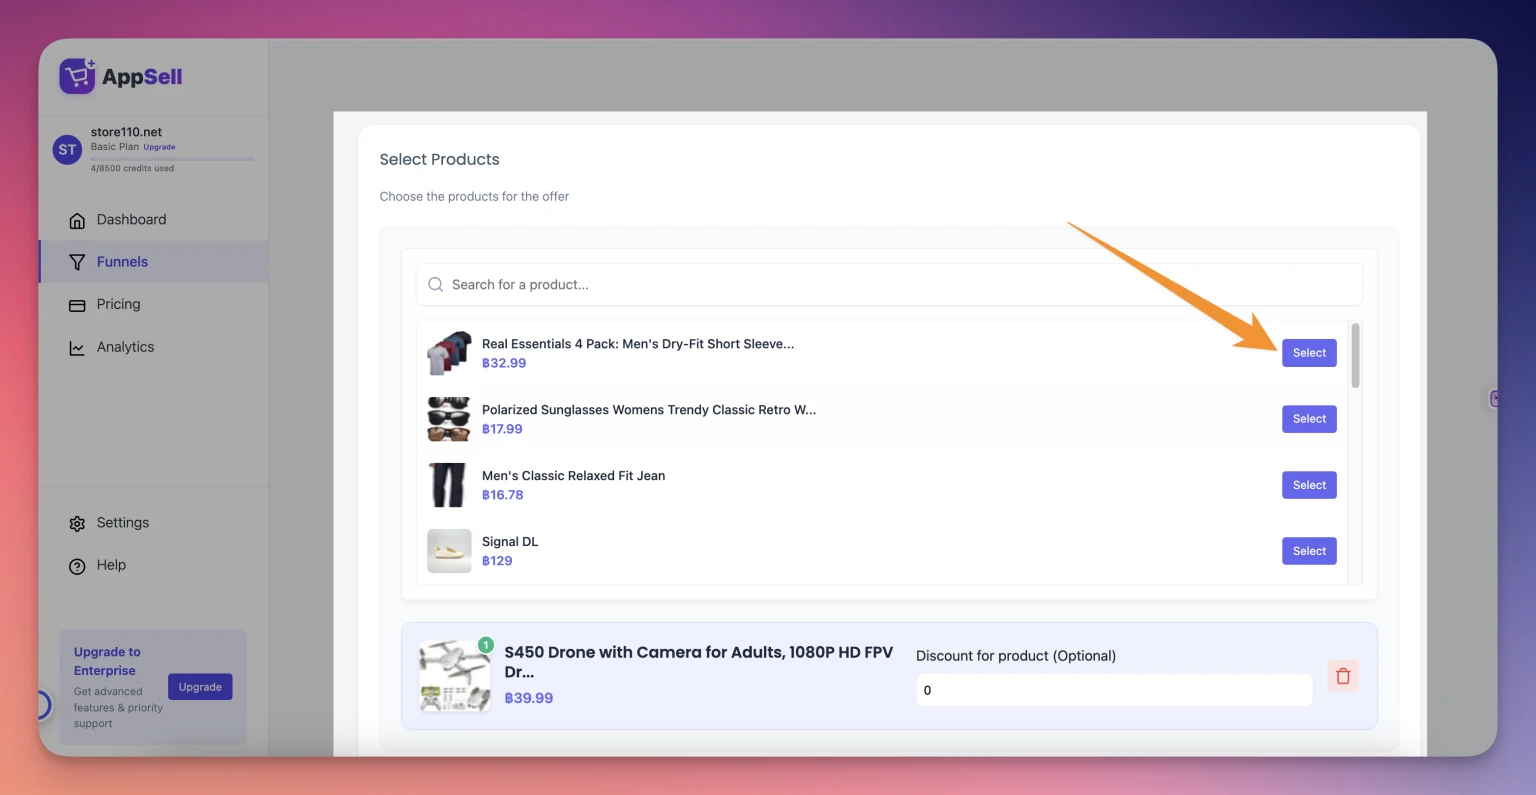
Step 6: Select Products for the Offer
Add one or more products to include in your upsell or cross-sell offer. Consider products that:
Complement the items already in the cart
Are frequently purchased together
Represent logical upgrades or add-ons
Pro tip: You can apply discounts to these products to make the offer more compelling and increase conversion rates.
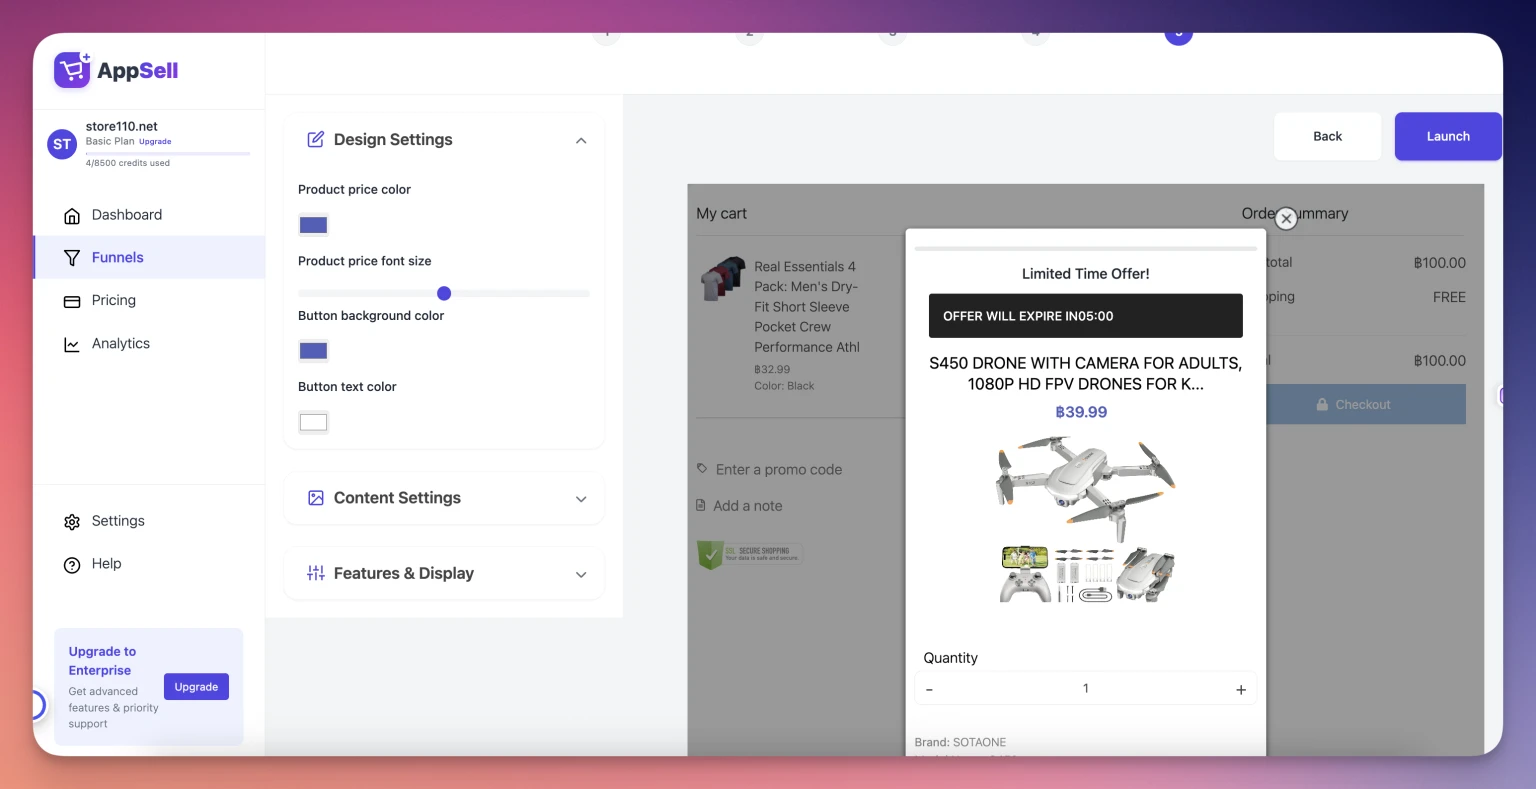
Step 7: Customize the Widget Design
Make your funnel match your brand and appeal to your customers:
Colors: Adjust to match your store's color scheme
Fonts: Choose typography that aligns with your brand
Text: Write compelling copy that motivates action
Layout: Arrange elements for maximum impact
Use the live preview feature to see exactly how your funnel will look to customers. When you're satisfied with the design, click Launch to activate your funnel.
Step 8: Test Your Funnel
Before considering your funnel complete, always test it thoroughly:
Visit your store as a customer would
Add the trigger products to your cart (or meet whatever conditions you set)
Confirm that the funnel appears correctly
Test the entire user flow, including adding offered products to the cart
Verify that the design looks good on both desktop and mobile devices
Testing ensures your customers will have a smooth experience and helps you catch any issues before they affect sales.
Final Tips for Success
Experiment with Different Approaches: Try various offers, triggers, and timing to discover what resonates best with your customers. What works for one store may not work for another.
Keep Offers Clear and Compelling: Your funnel copy should be concise and focus on the value customers will receive. Avoid overwhelming them with too much information.
Use Discounts Strategically: Well-placed discounts can significantly increase conversion rates, but don't discount everything. Test different discount levels to find the sweet spot.
Monitor Performance: Keep track of your funnel's performance and make adjustments based on real data. Small tweaks can lead to significant improvements in conversion rates.
Start Simple: Your first funnel doesn't need to be complex. Start with basic settings and gradually add more sophisticated targeting as you become more comfortable with the platform.
Ready to boost your sales? Follow these steps to create your first funnel and start seeing improved conversions today. Remember, the other funnel types (Volume Bundle Discount and Frequently Bought Together) follow a very similar process, so you'll be able to expand your strategy quickly once you've mastered the basics.
If you experience any issues or have any questions, please contact us here: